Stage Micrometers

- Stage Micrometers and Concentric Squares for Calibrating Distances
- Allows for Precise Measurements of Enlarged Images
R1L3S1P
10 mm Stage Micrometer with
50 µm Divisions
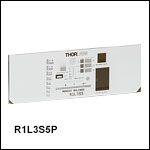
R1L3S5P
Combined Resolution and
Distortion Test Target with Micrometer
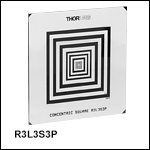
R3L3S3P
Concentric Squares Calibration Target

Please Wait
| General Specifications | |
|---|---|
| Chrome Thickness | 0.120 µm |
| Chrome Optical Density | OD ≥3 at 430 nm |
| Substrate Thickness | 0.06" (1.5 mm) |
| Surface Flatness | ≤15 µm |
| Line Spacing Tolerancea | ±1 µm |
| Line Width Tolerancea | ±0.5 µm |
| Substrate | Soda Lime Glass |
Features
- Horizontal Stage Micrometers with Divisions from 10 µm to 100 µm (1" x 1" or 3" x 3")
- Combined Resolution and Distortion Test Target with Stage Micrometers (3" x 1")
- Concentric Squares with Positive Pattern Sizes from 0.1 mm to 50 mm (3" x 3")
Thorlabs offers stage micrometers and concentric square patterns for calibrating distances in an imaging system. These targets feature soda lime glass substrates with vacuum-sputtered, low-reflectivity chrome. Each pattern is manufactured using photolithography, allowing for edge features to be resolved down to approximately 1 µm.
Mounting
These stage micrometers can be mounted in many of our microscope slide holders, including the five highlighted on Mounting Options tab. We also offer a variety of general fixed slide holders, microscope slide holders, and translation stages for microscopy.
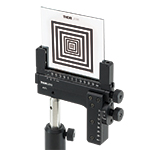
Our MAX3SLH fixed slide holder provides two spring clips to mount the optic and can be mounted to any of our 3-axis flexure stages. The MAX3SLH is only compatible with test targets greater than or equal to 1.73" (44.0 mm) wide and provides a clear aperture of 1", which may cover the chrome pattern on some of the test targets. Thorlabs also offers our XYF1(/M) test target positioning mount (see photo above) capable of translating a 1/2" (12.7 mm) to 3" (76.2 mm) wide rectangular target over a 50 mm (1.97") x 30 mm (1.18") area. The mount offers five 8-32 (M4) taps for six post-mountable orientations. The XYF1 uses nylon-tipped setscrews to secure the optic. Please note that the mount's support arms overlap the optic by 4.4 mm on each side. For users of the MLS203 microscopy stage, we offer the MLS203P2 slide holder for inverted microscopes, which can mount slides 25 mm to 26.5 mm wide and petri dishes 30 mm to 60 mm in diameter. We also offer the FFM1 and SFH2 fixed mounts for cage cube- or post-mounting, respectively.
| Targets Selection Guide | ||||
|---|---|---|---|---|
| Resolution Test Targets | Calibration Targets | Distortion Test Targets | Slant Edge MTF Target | Stage Micrometers |
| Mounting Options | |||||
|---|---|---|---|---|---|
| Mount Item # | MAX3SLH | XYF1(/M) | MLS203P2 | FFM1 with B3C | SFH2 |
| Image (Click to Enlarge) |
 |
 |
 |
 |
 |
| Compatible Target Item #s |
R1L3S1P, R1L3S2P, R1L3S5P | R1L1S5Pa, R1L3S1P, R1L3S2P, R1L3S5P, R3L3S3P |
R1L3S1P, R1L3S2P, R1L3S5P | R1L1S5P, R1L3S1P, R1L3S2P, R1L3S5P, R3L3S3P |
R1L1S5P, R1L3S1P, R1L3S2P, R1L3S5P, R3L3S3P |
| Features/Mounting | Mounts to 3-Axis Stages or Any with 1/4"-20 Taps |
XY Translation Ø1/2" Post Mountable |
Mounts to Our MLS203-1 and MLS203-2 Fast XY Scanning Stages |
Ø1/2" Post Mountable | Ø1/2" Post Mountable |
| Customization Parameters | ||
|---|---|---|
| Substrate Sizea | Min | 8 mm x 8 mm (5/16" x 5/16") |
| Max | 85 mm x 85 mm (3.35" x 3.35") | |
| Substrate Materials | Soda Lime Glass UV Fused Silica Quartz |
|
| Coating Material | Chromeb Low-Reflectivity Chromec |
|
| Coating Optical Density | ≥3d or ≥6e @ 430 nm | |
| Minimum Pinhole/Spot | Ø1 µm | |
| Minimum Line Width | 1 µm | |
| Line Width Tolerance | -0.25 / +0.50 µm | |
| Maximum Line Density | 500 lp/mm | |
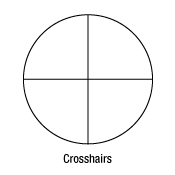
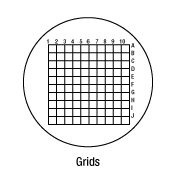
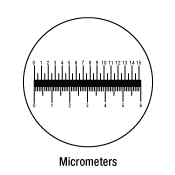
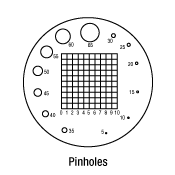
Custom OEM Test Targets and Reticles
Our in-house photolithographic design and production capabilities enable us to create a range of patterned optics. We manufacture test targets, distortion grids, and reticles at our Thorlabs Spectral Works facility in Columbia, South Carolina. These components have served a wide variety of applications, being implemented in microscopes, imaging systems, and optical alignment setups.
In addition to our catalog test targets and reticles offered from stock, we can provide custom chrome patterns on soda lime, UV fused silica, or quartz substrates from 8 mm by 8 mm up to 85 mm by 85 mm. Substrates can be cut to shape for your application. Our photolithographic coating process allows us to create chrome features down to 1 µm. A few sample patterns are shown below, which can be made positive or negative, as shown in the image directly below.
For a quote on custom test targets and reticles, please contact us at TSW@thorlabs.com.
Sample Patterns
Example Applications
- Etched Reticles
- Gray Scale Masks
- Resolution Reticles
- Diagnostic Reticles
- Recreational Scopes
- Notching Reticles
- Eyepiece Scales
- Illuminated Crosshairs
- Obstruction Targets
- Binocular Reticles
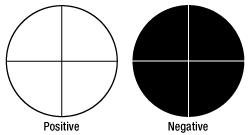
Click to Enlarge
Positive and Negative Crosshair Sample Pattern
This tab details an optimal cleaning technique developed by our engineers for cleaning reticles, test targets, distortion targets, and calibration targets.
Cleaning Procedure
- Use a clean wet sponge, preferably made of polyvinyl alcohol (PVA), and dish detergent to gently scrub the front and back surfaces of your reticle or target.
- Rinse with water.
- Blow dry with clean dry air, or allow the reticle or target to air dry on a clean surface.
We do not suggest using a towel, rag, or wipe to dry the surface. If contamination persists, soak the reticle or target in a detergent and water solution for 1 hour, repeating as necessary.
| Posted Comments: | |
user
(posted 2023-01-11 09:39:39.03) I'd like to know if the +/- 1 μm line spacing tolerance is valid for any pair of lines on the target. Or is the tolerance valid only for neighbouring lines, and the tolerance from the first to the last of for example a group of ten lines may be up to +/- 10 μm?
I suspect it is the former, but can you please confirm? Bill Albert
(posted 2021-12-01 10:40:26.26) Can ThorLabs supply calibration certificates with the Stage Micrometer Calibration Targets? cdolbashian
(posted 2021-12-23 01:59:08.0) Thank you for reaching out to us Bill. Right now, all we can provide is a self certification and/or a certificate of conformance provided you share your product's "TP number", which would be listed on the packaging of your product. We are aiming to provide NIST traceability in the future for our test and resolution targets. Stephanie G
(posted 2021-07-09 06:58:17.04) Are these compatible with transmission illumination? YLohia
(posted 2021-07-12 08:05:30.0) Hello, the positive targets consist of a chrome pattern plated on to a clear substrate and are useful for front-lit and general applications. Alternatively, the negative targets (can be custom ordered by emailing your local Thorlabs Tech Support team or techsales@thorlabs.com if you are in the US) use the same chrome coating to cover the substrate, leaving the pattern itself clear, and work well in back-lit and highly illuminated applications. Richard Krusemark
(posted 2021-06-18 11:35:59.29) You sell this with a specific statement that the unit is "useful for the calibration of distances within imaging systems". Yet this item does not come with any sort of certificate of conformance. Are you kidding me? You can't calibrate something with a complete unknown. Now I have to find a reputable company to calibrate my standards that I just bought that have no standard. I am so glad I waisted my companies money on these. I will be sure not to return to this site for more standards. cdolbashian
(posted 2021-06-25 09:20:35.0) Thank you for reaching out to us at Thorlabs! Following your feedback, we are working on a version of this product which has a calibration/conformance document included. I have reached out to you directly with some more information. |

Click to Enlarge
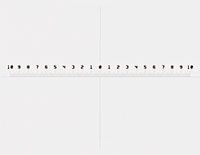
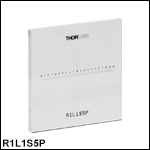
Close Up of the R1L1S5P Horizontal Scale with Crosshair
- 1" x 1" (25.4 mm x 25.4 mm) Stage Micrometer
- For Calibrating Eyepiece Reticles or Objective Magnification
- 20 mm Horizontal Scale with 100 µm Divisions and Crosshair
This target features a stage micrometer pattern with 100 µm divisions and numerical labeling every 1 mm. The pattern is oriented horizontally with a 20 mm long scale and a perpendicular crosshair. The target consists of a 1" x 1" soda lime substrate with low-reflectivity, vacuum-sputtered chrome. This positive target is useful for the calibration of distances within imaging systems.


Click to Enlarge
Microscope Image of R1L3S1P Stage Micrometer
- For Calibrating Eyepiece Reticles or Objective Magnification
- R1L3S1P: 10 mm Scale with 50 µm Divisions
- R1L3S2P: 1 mm Scale with 10 µm Divisions
- Scales Centered on a 3" x 1" (76.2 mm x 25.4 mm) Microscope Slide
These targets each feature a horizontal stage micrometer pattern. The R1L3S1P micrometer has a 10 mm long scale with 50 µm divisions and numerical labeling every millimeter, while the R1L3S2P has a 1 mm long scale with 10 µm divisions and numerical labeling every

Click for Details
R1L3S1P Under Magnification
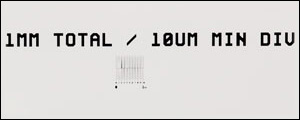
Click for Details
R1L3S2P Under Magnification

|
|
Click to Enlarge
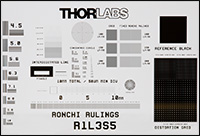
Close Up of R1L3S5P Stage Micrometer
| Optical Specifications | |
|---|---|
| Pattern | LRa Chrome |
| Background | Clear |
| Surface Flatness | ≤15 µm |
| Chrome Optical Densityb | ≥3.0 |
- 3" x 1" x 0.06" (76.2 mm x 25.4 mm x 1.5 mm) Target
- Includes NBS 1963A Pattern, Sector Star, Concentric Circles, Grids, Ronchi Rulings, and More (See Table Below)
- Determine Resolution of an Optical System
- Measure Image Distortion, Astigmatism, and Other Aberrations
- Compatible with our MLS203 Microscope Stages via MLS203P2 Slide Holder
The R1L3S5P positive 3" x 1" x 0.06" (76.2 mm x 25.4 mm x 1.5 mm) combined resolution / distortion test targets that are made by vacuum-sputtering low-reflectivity chrome with an optical density of ≥3 at 430 nm on a soda lime glass substrate. They are ideal for calibration of imaging systems and microscope stages. They are sized to fit in our MLS203P2 stage slide holder for use with our MLS203 microscope stages.
The test targets include an NBS 1963A pattern, a sector (Siemens) star, concentric circles, grids, Ronchi rulings, and more (see table below). These targets are useful for testing resolution, field distortion, focus errors, and astigmatism. The NBS 1963A, sector star, and concentric circle targets are useful for measuring imaging resolution. For more information, please see our Resolution Targets page. The grids can be used to measure the distortion introduced by an imaging system. The Ronchi rulings are excellent for evaluating resolution, field distortion, and parfocal stability.
| Target Feature | Details | Target Feature | Details |
|---|---|---|---|
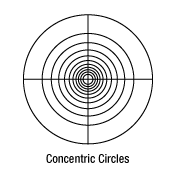
| NBS 1963A | Frequencies from 4.5 cycles/mm to 228 cycles/mm (See List Above) | Concentric Circles | 10 Circles with Radii from 100 µm to 1000 µm in 100 µm Intervals |
| Distortion Grid (Squares) | 3 Grids: 100 lp/mma, 150 lp/mm, 200 lp/mm | Fixed Ronchi Rulings | 3 Rulings:100 lp/mm, 150 lp/mm, and 200 lp/mm |
| Distortion Grid (Dots) | 3 Grids: 400 µm Pitch of Ø80 µm Dots, 200 µm Pitch of Ø 40 µm Dots, 100 µm Pitch of Ø20 µm Dots |
Variable Ronchi Rulings | 20 Rulings (Each 1 mm x 1 mm): 10 lp/mm to 200 lp/mm in |
| Two-Point Resolution Dots | Ø25 µm, Ø20 µm, Ø15 µm, Ø12.5 µm, Ø10 µm, Ø7.5 µm, and Ø5 µm | Pinholes | Ø25 µm, Ø20 µm, Ø15 µm, Ø12.5 µm, Ø10 µm, Ø7.5 µm, and Ø5 µm |
| Interdigitated Lines | 6.25 lp/mm, 12.5 lp/mm, 25 lp/mm, 50 lp/mm, 100 lp/mm, |
Three Micrometers | 1 mm x 1 mm XY Scale with 50 µm Divisions 1 mm Scale with 10 µm Divisions 10 mm Scale with 50 µm Divisions |
| Sector Star | 36 Bars through 360°, 50 µm Radius Center Circle, and Ten Concentric Circles with Radii from 100 µm to 500 µm in 50 µm Intervals | ||

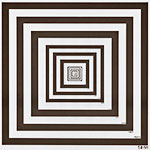
Click to Enlarge
R3L3S3P Concentric Square Pattern
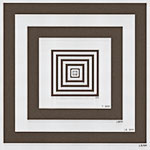
Click to Enlarge
Close Up of the Squares Smaller than 15 mm Wide on R3L3S3P Concentric Square Target
- 3" x 3" (76.2 mm x 76.2 mm) Concentric Square Target
- Calibrate a Measurement for Imaging Software
- Low-Reflectivity, Vacuum-Sputtered Chrome
The R3L3S3P Concentric Square Target features fourteen concentric squares with lengths and widths ranging from 0.1 mm to 50 mm (see table below). Each square is labeled with its width on the target. This target is made from a soda lime glass substrate with low-reflectivity, vacuum-sputtered chrome. These positive targets are useful for the calibration of distances within imaging systems.
|
|
 Products Home



 Click to Enlarge
 Click to Enlarge
 Click to Enlarge
 Click to Enlarge
 Click to Enlarge
 Click to Enlarge
 Click to Enlarge
 Click to Enlarge
 Zoom
Zoom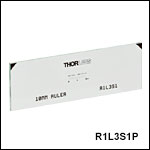
 Stage Micrometers