Laser Diode Mount with TEC
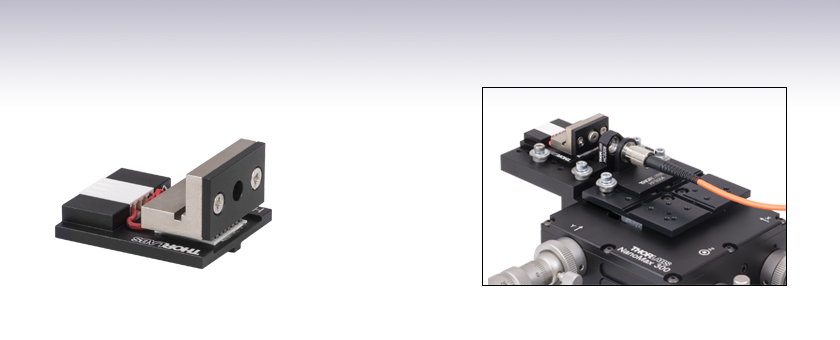
- Integrated TEC Element
- Ø5.6 mm and Ø9 mm LD Packages Supported
- Compatible with Multi-Axis Stage Platforms
Application Idea
Fiber Launch Using NanoMax 3-Axis Stage
HLD001

Please Wait
Features
- Built-In, 3 A TEC Element
- Multi-Axis Flexure Stage Platform Compatible
- Accepts Ø5.6 mm and Ø9 mm Laser Diode Packages
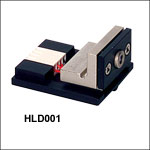
Thorlabs' HLD001 TEC stabilized laser mount is designed to integrate our Ø5.6 mm and Ø9 mm laser diodes into our multi-axis flexure platforms as well as provide temperature regulation for the diodes. The TEC element contained in this mount can sink up to 3 A to keep the laser diode at a constant temperature. Temperature stabilization of laser diodes is necessary for applications which require substantial control over a diodes power and wavelength. Thorlabs offers a wide variety of Temperature and Current Controllers suitable for laser diode temperature and current control. The TTC001 T-Cube™ Temperature Controller is often used in applications that utilize the HLD001 mount.
In addition to providing a TEC for temperature stabilization, the HLD001 mount is also designed to assimilate into a flexure platform. The mount features an alignment key that mates with a keyway of a flexure platform; yielding a simple and accurate method to integrate this mount into a flexure assembly. Integration into these multi-axis flexure mounts provides excellent control over a diode's position and alignment with optical systems.
Flexure stage mounts can be fixed in position using AMA010(/M) mounting cleats, which are sold below. Each cleat is designed with one edge milled flat, making it possible to insert or remove a flexure stage mount without removing the clamp. Simply loosen the clamp screw and rotate the flat side of the lock-down clamp inward to release the flexure stage mount.
| Laser Diode Accessory Selection Guide | |||||
|---|---|---|---|---|---|
| Other Temperature Controlled Mounts |
Passive Mounts | Passive Mounts with Collimation Package |
Strain Relief Cables | Diode Sockets | Controllers |
 |
 |
 |
 |
 |
 |
| Multi-Axis Stage Accessories | |||||||||||
|---|---|---|---|---|---|---|---|---|---|---|---|
 |
 |
 |
 |
 |
 |
 |
 |
 |
 |
 |
 |
| Fiber Mounts |
Fiber Rotators |
Waveguide Mounts |
Diode Mounts |
Fixed Mounts |
Kinematic Mounts |
Top Plates |
Extension Platforms |
Fiber Chucks |
Slide Holders |
Kinematic Platforms |
Adapter Plates |
| Posted Comments: | |
Peter Seem
(posted 2023-09-07 08:13:24.543) Is the can of the laser diode in electrical contact with the heatsink block and clamping plate? And is the can of the laser diode in electrical contact with the bottom plate (the on on which THORLABS and HLD001 are printed) or with any of the four electrical pins? user
(posted 2023-05-17 15:29:30.14) Can Pigtailed TO can laser diodes be mounted on HLD001 or is it only compatible with Free Space diodes? JReeder
(posted 2023-05-17 09:11:31.0) Thank you for your enquiry. The HLD001 can only be used with Free space Ø5.6 mm and Ø9 mm laser diode packages. It is not designed to be used with a pigtailed laser diode. AURELIEN DAVID
(posted 2020-11-06 12:19:04.947) Do you offer any cable which is compatible with the HLD connector?
If not, for connection to a CAB420: the CAB diagram shows three pins per polarity for the TEC (3 + and 3 -). Can I just connect one of each to the HLD?
And regarding the thermistor, is there a polarity? The CAB diagram shows one, but the HLD doesn't. DJayasuriya
(posted 2020-12-08 10:38:02.0) thank you for your inquiry. we do offer a connecter with the HLD but you would have to make you cable. here is the pin out :
1 peltier positive (top plate will cool down)
2 thermistor
3 thermistor
4 peltier negative (top plate will cool down)
hope this helps. If you have any further questions with your application please get in touch with your local tech support team, who'd be happy to help. cdaly
(posted 2013-01-24 16:40:00.0) Response from Chris at Thorlabs to Andrew: Thank you for using our webfeedback. If beam pointing is an issue, I would first check to make sure the diode itself is mounted securely in the TCLDM9 with the appropriate flange. If it's still offset with respect to the cage, perhaps the simplest solution would be to use a KCB1 mirror mount to steer the beam within the cage. If this is not an option, the HLD001 is certain worth looking into, but there are a few things you should note. There is no cable directly compatible with both of these devices so in order to used them together you would need to solder one using the extra connectors provided with the ITC and the socket provided with the HLD001. You should also be sure to make sure that this TEC can handle the heat generated by your diode. The capacity of the mount is 6.3 Watts, as opposed to the TCLDM9 which has a 20 W capacity. alee
(posted 2013-01-24 18:21:53.13) Hi,
Could you tell me if this mount is suitable for hooking upto an ITC4001 controller and if so what cables should be used? I'm using a UV, 5.6mm, style B laser diode. FYI I Currently use several TCLMD9 and LDM21 mounts but have a few issues with these, the very large cables and connectors take up a lot of room and put a lot of torque on the mounts, it's hard to keep them stable amd firmly positioned with just a 1/2" post. The beam coming from a mounted 5.6mm diode in one of these mounts is usually to off axis to use with a cage system as well, do you think a HDL001 mounted on a kinematic platform will be a worthwhile upgrade?
Regards
Andrew |

| Specifications | |
|---|---|
| Laser Diode Package | Ø5.6 mm and Ø9 mm |
| TEC Current | 3.0 A (Max) |
| TEC Voltage | 3.75 V (Max) |
| QMAX (@ IMax)a | 6.3 W |
| dTMAX (@ IMax)b | 67 °C |
| Temperature Sensor | 10 kΩ Thermistor |
The HLD001 TEC stabilized laser mount is designed to integrate our Ø5.6 mm and Ø9 mm laser diodes into our multi-axis flexure platforms as well as provide temperature regulation for the diodes.
| Pin Connections | |
|---|---|
| Pin 1 | Peltier Cooler +Ve |
| Pin 2 | Thermistor |
| Pin 3 | Thermistor |
| Pin 4 | Peltier Cooler -Ve |

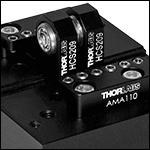
Click for Details
Accessories mounted in close proximity using the AMA110 Mounting Block.
- Secures Components to NanoMax, MicroBlock, or RollerBlock Stages
- Cleats for Mounting Single Components
- Mounting Blocks and Clamps for Close Proximity Mounting of Multiple Components
The AMA010(/M) Cleats have a flat milled along one side. To lock an accessory along the center alignment groove, rotate the cleat so that the flat is facing the groove. Place the accessory into the groove between the cleats, rotate the cleat so that the rounded edge covers the edge of the mount, and lock down the 6-32 (M3) locking screw and washer. The cleats can be rotated without needing to remove the locking screws. See the animation to the right for details. The included screws are 5/16" (8 mm) long and are used with a 3/32" (2.5 mm) hex key.
For mounting multiple components in close proximity, we offer the AMA110 mounting blocks. These mounting blocks feature a line of nylon-tipped setscrews to secure components, and allow for easy repositioning and very close mounting. The blocks are secured via two holes and are supplied with either 6-32 or M3 cap screws.
The AMA111 Narrow Device Mounting Clamps offer an alternative solution when devices need to be mounted close together. They are secured using an M3.5 or M3 washer and a 6-32 or M3 cap screw, compatible with a 7/64" or 2.5 mm hex key, respectively.
 Products Home


 Zoom
Zoom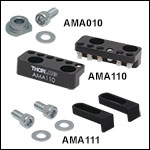


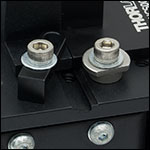
 Diode Mount with TEC